Building your own gaming PC is one of the most rewarding experiences in the tech world. Not only do you save money compared to pre-built systems, but you gain the knowledge to upgrade and maintain your rig for years to come. This comprehensive guide will walk you through every step of building a gaming PC, from selecting components to powering on your finished build.
At PC Express in Sale, Manchester, we help customers build dozens of gaming PCs every month. Whether you are a complete beginner or need expert guidance, this guide contains everything you need to know.
Why Build Your Own Gaming PC?
Building a gaming PC yourself offers several compelling advantages:
- Cost Savings: You can often save 20-30% compared to equivalent pre-built systems
- Customization: Choose exactly the components that match your gaming needs and budget
- Learning Experience: Understand how your computer works, making future upgrades easier
- Better Components: Avoid the cheap power supplies and motherboards often found in pre-built PCs
- Upgrade Path: Build with future upgrades in mind
- Pride of Ownership: There is nothing quite like booting up a PC you built yourself
Essential Components: What You Need
Every gaming PC requires these core components. Understanding each part helps you make informed decisions:
1. Processor (CPU)
The CPU handles all general computing tasks and game physics. For gaming in 2026:
- Budget Option: AMD Ryzen 5 7600 or Intel Core i5-13400F
- Mid-Range: AMD Ryzen 7 7700X or Intel Core i7-13700F
- High-End: AMD Ryzen 9 7900X or Intel Core i9-13900F
2. Graphics Card (GPU)
The most important component for gaming performance:
- 1080p Gaming: RTX 4060, RTX 4060 Ti, or RX 7600
- 1440p Gaming: RTX 4070, RTX 4070 Super, or RX 7700 XT
- 4K Gaming: RTX 4080, RTX 4090, or RX 7900 XTX
3. Motherboard
Connects all your components together. Choose based on your CPU socket:
- AMD: AM5 socket for Ryzen 7000 series
- Intel: LGA 1700 for 13th gen processors
- Features: Built-in WiFi, sufficient USB ports, PCIe slots for future expansion
4. Memory (RAM)
Modern games benefit from fast, sufficient memory:
- Minimum: 16GB DDR4-3200 or DDR5-5600
- Recommended: 32GB for future-proofing and content creation
- Speed: DDR5 offers better performance but costs more than DDR4
5. Storage
Fast storage dramatically improves game loading times:
- Primary Drive: 1TB NVMe SSD (PCIe 4.0 for best performance)
- Secondary Storage: Additional SSD or traditional HDD for mass storage
- Avoid: Using only traditional hard drives for game installations
6. Power Supply (PSU)
A quality PSU protects your entire system:
- Wattage: 650W minimum for mid-range builds, 850W+ for high-end
- Efficiency: 80+ Gold certification for efficiency and reliability
- Modular: Semi or fully modular for better cable management
7. PC Case
Your case houses everything and affects cooling:
- Size: Mid-tower cases offer the best balance of size and features
- Airflow: Look for mesh front panels and multiple fan mounting points
- Features: USB-C ports, tempered glass panels, and good cable management space
8. Cooling
Keep your components at safe temperatures:
- CPU Cooling: Stock coolers work for basic use, aftermarket coolers for better performance
- Case Fans: 2-3 intake fans and 1-2 exhaust fans for good airflow
- Liquid Cooling: AIO liquid coolers for high-end CPUs and aesthetic appeal
Before You Begin: Essential Preparation
Tools You Will Need
- Phillips head screwdriver: The primary tool for PC building
- Anti-static wrist strap: Protects components from static electricity (optional but recommended)
- Cable ties: For clean cable management
- Thermal paste: Usually included with CPU coolers
- Good lighting: Ensure you can see clearly inside the case
Workspace Setup
- Clean, flat surface: Kitchen table or large desk works well
- Anti-static mat: Or touch a grounded metal object regularly
- Component organization: Keep boxes and manuals handy
- Remove carpets: Build on hard flooring if possible to avoid static
Pre-Build Component Testing
Professional builders often test components outside the case first:
- Install CPU, RAM, and GPU on motherboard
- Connect power supply and monitor
- Boot to BIOS to confirm everything works
- This saves time if any component is defective
Step-by-Step Building Process
Step 1: Install the Motherboard
The motherboard is the foundation of your build. Take your time with this crucial step:
- Install I/O Shield: Press the metal I/O shield (comes with motherboard) into the rectangular slot at the back of your case. Ensure all tabs are properly seated.
- Install Motherboard Standoffs: Screw brass standoffs into the case where they align with holes in your motherboard. Never skip this step – it prevents short circuits.
- Place Motherboard: Gently lower the motherboard into the case, aligning ports with the I/O shield. The motherboard should sit flat on all standoffs.
- Secure with Screws: Use the screws that came with your case to secure the motherboard. Do not overtighten – snug is sufficient.
Pro Tip: Install the CPU, RAM, and CPU cooler before putting the motherboard in the case. It is much easier to work on a flat surface.
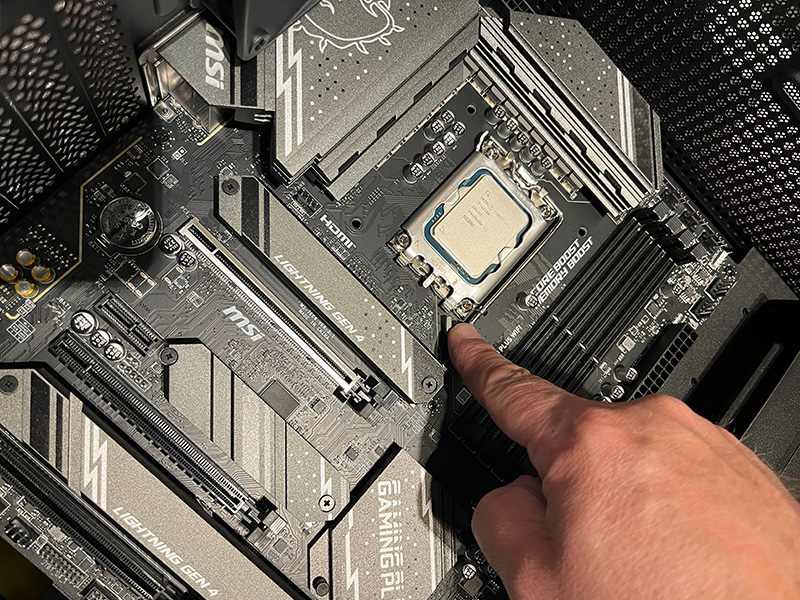
Step 2: Install the CPU
The CPU is the most delicate component. Handle with extreme care:
For AMD Processors:
- Open CPU Socket: Lift the retention arm on the motherboard socket
- Remove Plastic Cover: Take off the plastic socket cover (save it in case of warranty returns)
- Align CPU: Look for the gold triangle on the CPU corner that matches the socket
- Drop into Place: The CPU should drop in without force. Never press down.
- Close Retention Arm: Lower the arm to secure the CPU
For Intel Processors:
- Open Socket: Push down and pull the retention arm to the side
- Remove Cover: Lift out the plastic socket cover
- Align CPU: Match the notches on the CPU with the socket
- Place CPU: It should sit flat without force
- Close Socket: Lower the retention plate and push the arm back into place
Warning: Never touch the CPU pins (AMD) or contacts (Intel). Handle only by the edges.
Step 3: Install RAM Memory
Modern motherboards support dual-channel or quad-channel memory:
- Check Manual: Consult your motherboard manual for correct slot configuration
- Open Clips: Push down the plastic clips on both ends of the RAM slots
- Align Memory: Match the notch in the RAM stick with the slot divider
- Insert Firmly: Press down evenly until clips snap into place
- Verify Seating: Ensure RAM sticks are flush and clips are fully closed
Configuration Tip: For two RAM sticks, use slots 2 and 4 (usually color-coded) to enable dual-channel mode for better performance.
Step 4: Install CPU Cooler
CPU coolers vary significantly in installation method:
Stock Cooler Installation:
- Apply Thermal Paste: If not pre-applied, use a rice-grain sized amount on the CPU
- Mount Cooler: Follow manufacturer instructions – each brand differs
- Connect Power: Plug the cooler fan cable into the CPU_FAN header on motherboard
- Check Contact: Ensure even pressure across the CPU surface
Aftermarket Cooler Tips:
- Remove any plastic from the cooler base
- Check if your cooler needs a mounting bracket for your socket
- Large coolers may require case clearance checks
- Some coolers install easier with motherboard outside the case
Step 5: Install Power Supply
The PSU orientation matters for cooling and cable management:
- Check Fan Orientation: If your case has bottom ventilation, install PSU with fan facing down for better cooling
- Slide into Position: Insert PSU from inside the case with power switch accessible from the back
- Align Screw Holes: Line up the four mounting holes with case
- Secure with Screws: Use PSU screws (usually black) from outside the case
- Leave Power Cord Disconnected: Do not plug into mains power yet
Modular PSU Tip: Connect cables before installing the PSU in tight cases. Only connect cables you actually need.
Step 6: Connect Power Cables
Your motherboard and components need several power connections:
Essential Power Connections:
- 24-pin ATX: Main motherboard power (largest connector)
- 8-pin CPU: CPU power near the top-left of motherboard
- 6/8-pin PCIe: Graphics card power (if required)
- SATA Power: For drives (SSD/HDD)
- Molex: For older components or case fans
Cable Management: Route cables behind the motherboard tray where possible. Good cable management improves airflow and appearance.
Step 7: Install Storage Drives
Modern PCs typically use both SSDs and traditional hard drives:
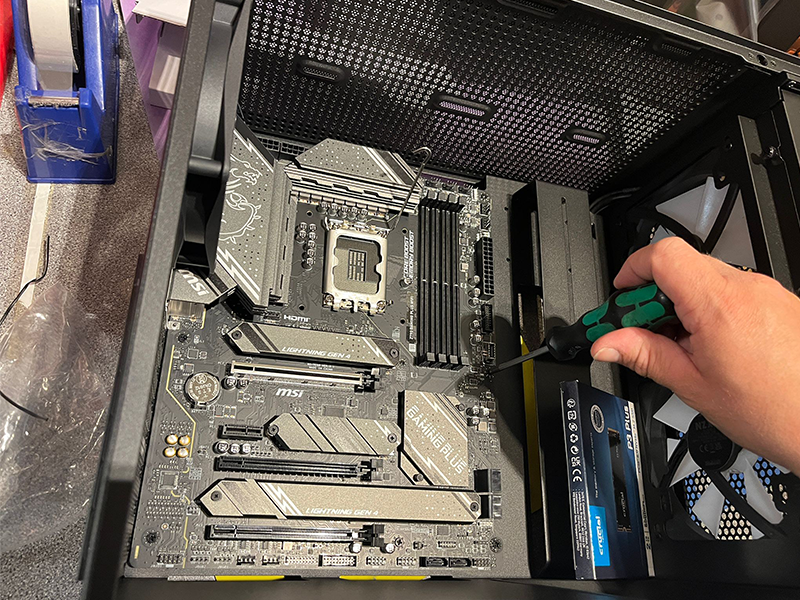
M.2 NVMe SSD Installation:
- Locate M.2 Slot: Usually near the CPU socket or bottom of motherboard
- Remove Mounting Screw: Keep this screw safe
- Insert SSD: Slide in at 30-degree angle, then press down
- Secure with Screw: Replace the mounting screw
2.5″ SSD/HDD Installation:
- Mount in Case: Use drive bays or mounting brackets
- Connect SATA Data: SATA cable to motherboard
- Connect SATA Power: Power cable from PSU
- Secure Drives: Use provided screws to prevent vibration
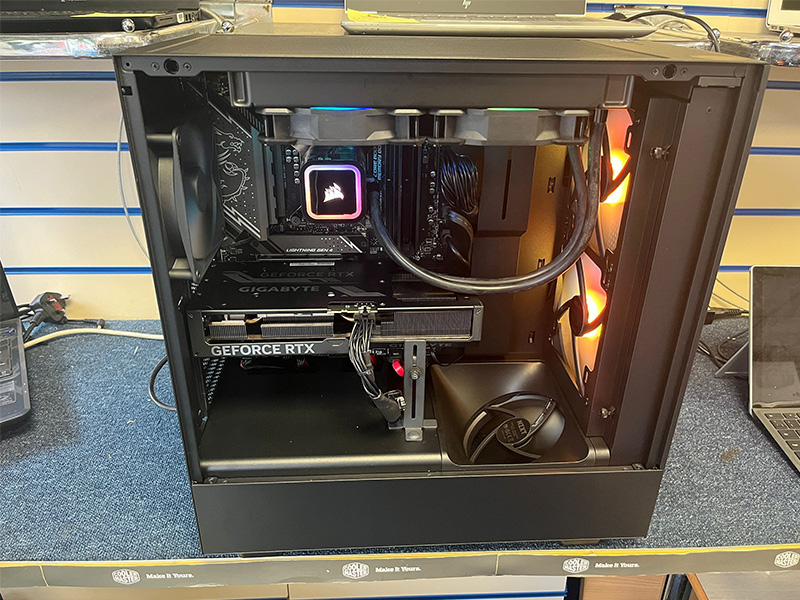
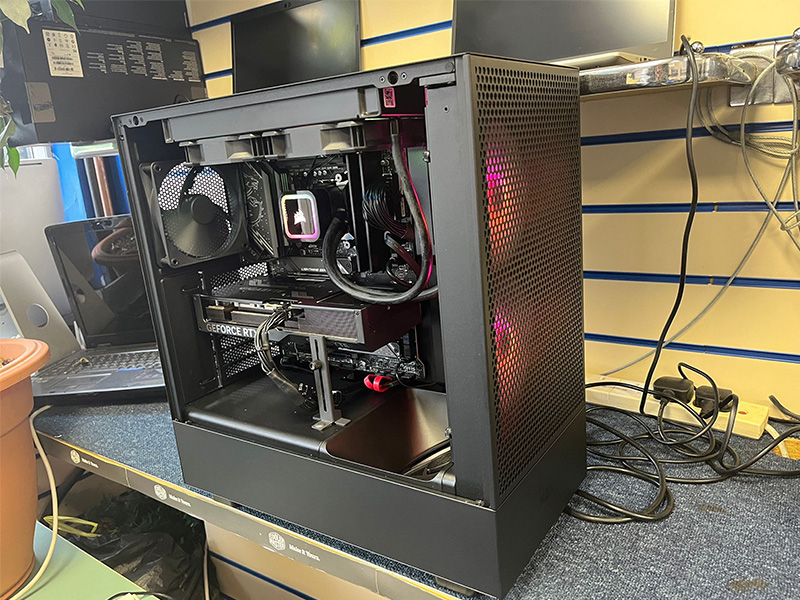
Step 8: Install Graphics Card
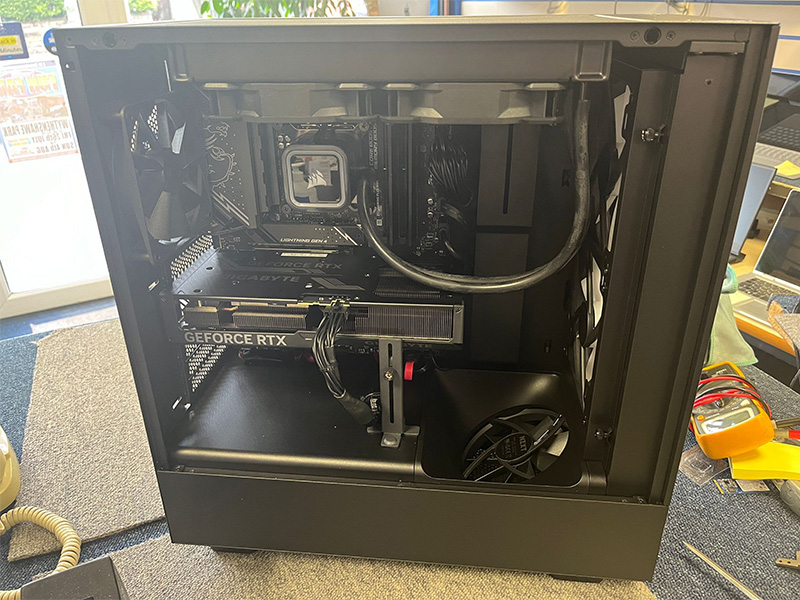
The graphics card is usually the largest and most expensive component:
- Remove PCIe Slot Covers: Take out 2-3 metal slot covers from the case back panel
- Open PCIe Clip: Push down the clip on the motherboard PCIe x16 slot
- Insert Graphics Card: Align with top PCIe x16 slot and press down firmly until it clicks
- Secure with Screws: Attach GPU bracket to case with screws
- Connect Power: Attach required PCIe power cables
- Check Clearance: Ensure no cables interfere with GPU fans
Large GPU Tip: High-end graphics cards are heavy. Consider a GPU support bracket to prevent PCIe slot damage.
Step 9: Connect Front Panel Connectors
These tiny connectors control power button, USB ports, and activity LEDs:
Common Front Panel Connections:
- Power Button: PWR_SW or similar marking
- Reset Button: RST_SW connector
- Power LED: PWR_LED (positive and negative connections)
- HDD Activity LED: HDD_LED connector
- USB Headers: USB 2.0 and USB 3.0 connectors
- Audio Headers: HD_AUDIO connector for front panel jacks
Connector Tip: Consult your motherboard manual for exact pin layout. These connectors are often labeled but can be confusing.
Step 10: Final Checks and Cable Management
Before powering on, perform these crucial checks:
Component Checklist:
- All power connections secure (24-pin, CPU, GPU)
- RAM fully seated in correct slots
- CPU cooler properly mounted and connected
- Graphics card firmly installed
- All case fans connected
- No loose screws in case
Cable Management:
- Route cables behind motherboard tray
- Use cable ties to secure loose cables
- Ensure no cables obstruct fans
- Keep 24-pin and CPU cables away from GPU
First Boot and Setup
Initial Power On
The moment of truth – powering on your build:
- Final Visual Check: Look for any obvious issues
- Connect Monitor: Plug into graphics card (not motherboard)
- Connect Power Cord: Plug PSU into mains power
- Turn on PSU: Flip power switch on back of PSU
- Press Power Button: Use case power button
Successful Boot Signs:
- Fans spin up (CPU, GPU, case fans)
- LED lights illuminate
- Monitor displays BIOS/UEFI screen
- No continuous beeping or error codes
If It Does Not Boot:
Do not panic – this is common with first builds:
- Check Power Connections: Ensure 24-pin and CPU power are connected
- Reseat RAM: Remove and reinstall memory sticks
- Clear CMOS: Reset BIOS to defaults using motherboard jumper
- Single RAM Stick: Try booting with one RAM stick
- Remove GPU: Boot with integrated graphics first
BIOS Setup and Configuration
Once your PC boots, configure essential BIOS settings:
Essential BIOS Settings:
- Enable XMP/DOCP: Activate RAM speed profiles
- Check CPU Temperatures: Ensure under 80°C at idle
- Set Boot Priority: USB first for OS installation
- Enable Secure Boot: For Windows 11 compatibility
- Update BIOS: Check manufacturer website for latest version
Fan Curve Configuration:
Set up intelligent fan curves for optimal cooling and noise:
- CPU fans: Aggressive curve for cooling performance
- Case fans: Gentle curve for quiet operation
- GPU fans: Usually managed by graphics card software
Gaming PC Optimization Tips
Performance Optimization:
- Disable Unnecessary Startup Programs: Reduce boot times
- Enable Game Mode: Windows gaming optimizations
- Configure Graphics Settings: Balance quality and performance
- Monitor Temperatures: Use software like HWiNFO or Core Temp
- Regular Maintenance: Clean dust from components monthly
Future Upgrade Planning:
- GPU Upgrades: Usually the first component to upgrade for gaming
- Storage Expansion: Add more SSDs as game libraries grow
- Memory Upgrade: 32GB for future-proofing
- CPU Upgrade: Usually last 4-6 years before needing upgrade
Common Build Mistakes to Avoid
Costly Mistakes:
- Forgetting I/O Shield: Must be installed before motherboard
- Wrong RAM Slots: Use correct slots for dual-channel
- CPU Installation Errors: Bent pins or incorrect orientation
- Insufficient Power Supply: Under-powering high-end components
- Poor Cable Management: Affects airflow and appearance
Safety Reminders:
- Discharge static electricity regularly
- Never force components – they should fit easily
- Keep component boxes until build is complete
- Test components before final assembly
When You Need Professional Help
Building a PC can be challenging, especially for first-time builders. Here are situations where professional assistance is worth considering:
Complex Issues:
- Component Incompatibility: When parts do not work together as expected
- BIOS Problems: Advanced BIOS configuration or recovery
- Hardware Defects: Identifying faulty components
- Performance Tuning: Overclocking and advanced optimization
- Custom Cooling: Advanced liquid cooling installations
Expert Help Available in Sale, Manchester
At PC Express, we understand that building a gaming PC can seem overwhelming. Our experienced technicians have built thousands of gaming PCs and can help at every stage:
Our Services Include:
- Component Selection: Help choosing the right parts for your budget and gaming needs
- Compatibility Checking: Ensure all components work together perfectly
- Professional Assembly: Expert building with premium cable management
- System Testing: Comprehensive stress testing and benchmarking
- OS Installation: Windows setup with all necessary drivers
- Gaming Optimization: Performance tuning for your specific games
- Future Upgrade Advice: Plan your upgrade path for maximum value
Why Choose PC Express for Your Gaming PC:
- Local Expertise: Based in Sale, Manchester – not a faceless online company
- Experienced Team: Decades of PC building experience
- Quality Components: We only recommend reliable, performance-focused parts
- Comprehensive Testing: Every build is tested thoroughly before delivery
- Ongoing Support: Local support for upgrades, maintenance, and troubleshooting
- Competitive Pricing: Fair prices without the markup of large retailers
Conclusion: Your Gaming Journey Starts Here
Building a gaming PC is an incredibly rewarding experience that gives you complete control over your gaming performance. While the process might seem complex at first, taking it step by step makes it entirely achievable for beginners.
Remember these key points:
- Take Your Time: Rushing leads to mistakes
- Read Manuals: Component manuals contain crucial information
- Start Simple: You can always upgrade later
- Ask for Help: Professional guidance can save time and prevent costly errors
- Enjoy the Process: Building a PC should be fun, not stressful
Whether you decide to build it yourself or want professional assistance, the experts at PC Express in Sale, Manchester are here to help you create the perfect gaming PC for your needs.
Ready to start your gaming PC build? Visit us at 185 Washway Road, Sale, Manchester M33 4AH, or call 0161 291 1044 to discuss your gaming PC project. We are open Monday-Friday 9am-5:30pm and Saturday 10am-2:30pm.
Your perfect gaming PC awaits – and we are here to make sure you get exactly what you need for years of incredible gaming performance.